
 Nutella is pretty delicious, and I’ve been curious about making a version of it myself. I was wondering what it would be like fresh and without having the first two ingredients be sugar and palm oil. In case you didn’t catch it, Nutella settled a somewhat hilarious class action lawsuit last year over misleading health claims. I decided to try making a more wholesome version with just hazelnuts and chocolate, first ingredient hazelnuts. It’s quite simple to make with a Vitamix, but I took a few missteps the first two times I made it.
The first time I made it I over-roasted the hazelnuts. I found recipes that suggested roasting 10-15 minutes at 350 F, until the skins start to darken. I didn’t really notice the skins change color, so I took them out after 15 minutes. I noticed that they continued to roast out of the oven, as I could still hear them quietly hissing/sizzling for quite some time. They ended up with a slightly burnt flavor.
The second time I tried soaking the hazelnuts for 8 hours and then drying them in the oven on low (at ~120 F) for 24 hrs. That batch turned out OK, but it lacked the nice hazelnut flavor. I think some of the flavor leaches out into the water, and you also miss out on the tasty Maillard Reaction products of roasting.
The third time I roasted the nuts at 300 F and took them out after 10 minutes. This batch worked out nicely. I would recommend roasting until you start to smell the nuts. Remember that they will continue to roast a bit after you take them out. The lower temperature gives you a wider window to shoot for. I don’t think you can use a prescribed temperature and time because ovens will vary, and, perhaps more importantly, the state of the nuts will vary (more moisture would mean more roasting time).
The simplest way to make this recipe is by using sweetened chocolate, which is what I did this time; I used dark chocolate (Trader Joe’s) because I’m a dark chocolate fan, but you could also use a milk chocolate. Alternatively you can use unsweetened chocolate plus sugar (powdered sugar is ideal, since it will blend in faster; you can make powdered sugar with a high-power blender by just blending white sugar alone). You could also use cocoa plus sugar, although in that case you might want to add some additional fat (that’s why I like using bar chocolate–it includes the cocoa butter).
This recipe is for the minimum amount that will blend in the Vitamix (using either the 32-oz, 48-oz, or tall 64-oz container; the new short 64-oz containers have wider bases and require a greater volume to circulate). It would be less effort if you made a larger batch because then you wouldn’t need to stop the machine to push the mixture into the blades a few times. I decided that the extra work of stopping the machine is worth it, given that I think this should ideally be consumed within 1 week and we’re a small household.
Ingredients
1 cup hazelnuts
1.7 oz chocolate (or to taste)
If you’re not using sweetened chocolate, I would start with 1 oz unsweetened chocolate plus 3 tablespoons of sugar (ideally powdered, though not necessary), and then add more chocolate or sugar to taste. If you use cocoa instead of baking chocolate, start with 3 tablespoons of cocoa, plus a tablespoon of fat; a few possibilities: canola oil, hazelnut oil, butter, or coconut oil (coconut would make it harder at low temperatures). If you want to end up with a thinner consistency you can add some milk or a light oil like canola. With just the hazelnuts and chocolate, this recipe ends up similar consistency to butter: solidified, but not too hard at fridge temperature.
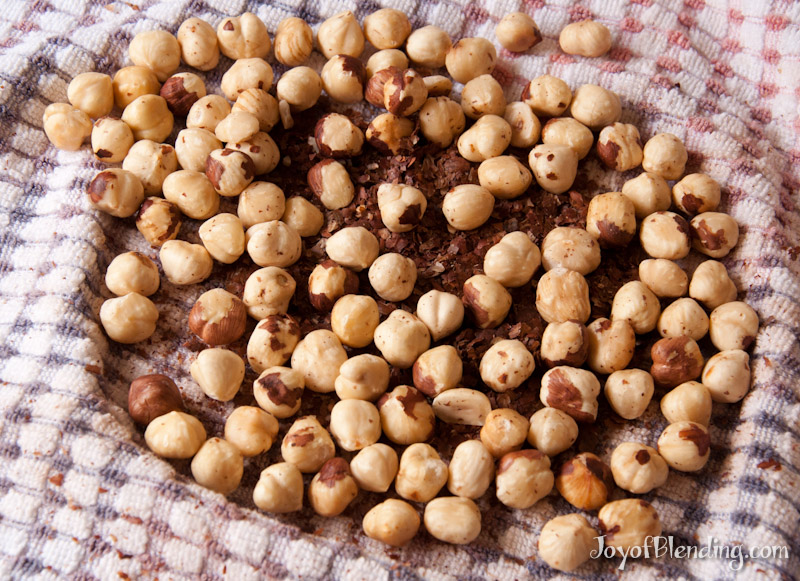 Roast the hazelnuts at 300 F, stir them after ~5 minutes, and remove them after ~10 minutes, once they’ve started to become fragrant. Be careful about over-roasting and remember that they will continue to roast a bit after you take them out. Remove the skins by putting the hazelnuts in a clean dish towel and rubbing them around. Most likely not all of the skins will come off easily, but it’s fine to leave some on. If you have time, let them cool. Then blend at max speed.
First the nuts will turn into a flour, and the flour will fly away from the blades and start to stick to the corners of the container. Try to push it down with the tamper, although if you’re blending just 1 cup the tamper will have trouble reaching. So stop the machine and scrape the flour off the edges and out of the bottom corners with a spatula or chopstick. Turn it back on and blend again; you may have to repeat this cycle a few times. (If you want to make this easier, you could make a double batch and then the tamper would be able to reach much better and you probably wouldn’t have to stop it.) Keep going until you start to get a paste. Then add the chocolate. The chocolate will bounce around at first, but keep going and it will melt from the heat of blending, and it will help get the hazelnut paste circulating. You may want to stop again to scrape down the sides. Eventually you’ll end up with a liquid circulating. You can taste it and decide if you want to add more chocolate.
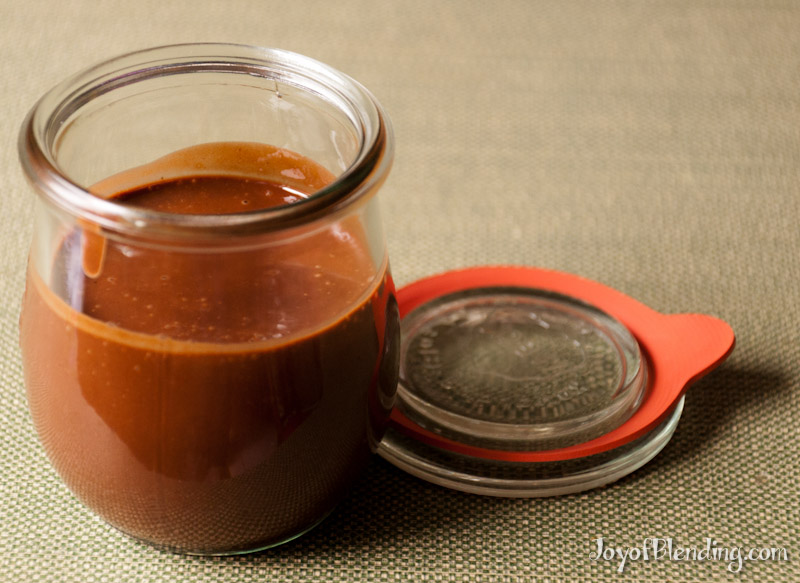
Pour into a container for storage in the refrigerator. It will partially solidify once it cools, though it remains spreadable even at fridge temperature.
Enjoy it on toast, fruit, or just off a spoon! We also had it with some Trader Joe’s mini freezer croissants, which was pretty divine.
This sounds amazing!
This is very very good. I made it with just one cup of nuts. It was to hard to get to the blades. So I added another cup or nuts. It worked much easier. I used cocoa powder and confectioner sugar and hazelnut oil. I have to say it is really good. I’m glad I found this recipe.
My mixture curdled in the Vitamix. The fat separated from the solids. Did I process it too long?
I haven’t seen this happen before. Can you tell us what ingredients you were you using, and how you processed them?
Oh wow, that’s similar to what happened to my chocolate treat which I just posted about in another thread. It balled up with some curdling, and just sat there in a pool of oil.
The curdled chocolate may be caused by water. Tiniest drop of water will cause chocolate to seize up. Hope that helps.
You say here that the 48 oz pitcher has a wider base than the tall 64oz and the 32oz. I’m thinking of getting a 48 oz pitcher so I can keep it under my cabinets. But I dont want a wider pitcher because I like to make smaller, low liquid smoothies and I think a wider pitcher would requier more ingredients. I know the 48oz has the 3 inch blades like the tall 64oz and they look the same at the base with the heights being the only difference. So are they wider and would they requier more ingredients? Thanks, Laura
Good eye! I think you are mostly right, and I was mostly mistaken. The 48-oz container indeed has 3-inch blades. I have 32-oz and 64-oz containers, so when I wrote this I was looking at the picture of containers on the Vitamix site. If you look closely you’ll see that the 48-oz container has the same bottom as the 64-oz container, but then it widens out a bit sooner than the tall 64-oz container. When I wrote this post I was trying to err on the side of caution.
In the time since I wrote this, I’ve talked to a Vitamix employee who in fact recommended the 48-oz container over the wide 64-oz container for small volumes. So I now think that the 48-oz container is a perfectly good option for smaller volumes. I suspect that there may be a tiny difference between it and the 32-oz and tall 64-oz containers, but that difference may be negligible. I hope to get my hands on one so I can do some direct testing myself.
thanks, I’m happy with my 64oz, if only it would fit under the cabinet. So I guess the 48oz would blend the same as the 64oz.
Pingback: TodaysMama.com - 7 Vitamix Recipes
I am in the process of making cashew Nutella butter and it has curdled.. Help, any suggestions to rescue the butter.
I haven’t seen this happen myself. My inclination would be to just keep blending, maybe add some more chocolate or possibly add some oil? Do you have enough ingredients in the container that it is circulating well?
For all those who have separation or curdling, if using a wet sweetener like honey or agave omit from blender and stir by hand at the end. for those finding this post too late, I try to strain out most of the oil (reserve for later use) add 2 ripe bananas and dehydrate for a warm gooey brownie type treat. i flip the brownie after 8 hours and dehydrate a total of 24 hours. cut and store in a container in fridge. the cold will make them set a bit firmer.
I ventured into making hazelnut coffee, inspired by this link http://www.mrcoffee.com/blog/archive/2015/september/how-to-make-a-cup-of-homemade-hazelnut-goodness.html
However, I didn’t follow the instructions fully. In my 32oz dry blades container, I ground the coffee beans first (using a tamper, Var 8 for 10 sec) and dumped the powder out. Then separately I ground the shelled raw hazelnuts with skin using variable 1 and up to 8 for 10 seconds with a tamper. At the end of 10 seconds, I stopped the machine and used spatula to stir the content a bit, then resumed the grinding. 2 seconds into it, the pulverized powder somehow turned into nut butter like texture. What did I do wrong??? Note that I used the “dry” blades. Also I frose the hazelnuts before grinding. Thanks!!!
If you want to avoid turning the hazelnuts into nut butter, I would use a lower speed. Try around speed 2-4. (pre-freezing was a good idea.)
Thanks Adam. I’ll give it a try. Happy Holidays!
I was apprehensive about ending up with a sticky, lumpy or grainy mess… But this recipe delivered! I used 2 cups hazelnuts, 5.4 ounces Trader Joe’s Pound Plus bar chocolate. I felt it needed a pinch of salt and also about 2 ounces powdered sugar. The nuts I had weren’t peeled too well, so mine has a touch of bitterness. That may be why I had to add sugar. But so smooth and the nut blending was so painless in the Vitamix.
Thanks for sharing your experience!