
 This isn’t strictly a Vitamix recipe, but I use the Vitamix to grind the whole grains. In addition to yielding maximally fresh whole-grain flour, this also gives you more flexibility to explore different kinds of flour. Want to try adding some oat flour? Buckwheat? Rice? Quinoa? No problem. This particular recipe uses a 50-50 blend of wheat and rye. Whole-grain breads are generally denser than their white counterparts, and this is no exception, but it gets a decent rise.
Not everyone will like the sourness of this bread, but I think it’s great. It has a much more interesting flavor profile than quick yeast breads. It also stays fresh longer and may be nutritionally superior.*
Using sourdough instead of commercial yeast is not more difficult, it just takes slightly more waiting. This no-knead recipe is actually less work than a fast-rising bread that requires kneading. I’ve settled on a procedure that uses two rises: the first overnight, and the second in the morning. The long overnight rise is what makes kneading unnecessary. The one thing about this method is that you need to have enough time for the rise in the morning, so this is not a recipe to try if you are rushing to get out the door. However, on weekends you can proceed with whatever else you’re doing around the house and just put the bread in the oven when it’s ready.
I don’t have much experience with bread, so more experienced bakers may take issue with some of my steps, but this is an easy routine that anyone can do.
Many of the no-knead bread recipes that I consulted use a dutch oven. However, I don’t currently own a dutch oven, so I just use a loaf pan instead. This has the added convenience of not having to worry about forming the dough. I just scrape it into the loaf pan without having to handle it at all.
Sourdough starter
The only non-trivial part of this recipe is getting a sourdough starter. It’s not hard, but it will take a little effort the first time around. You can either make your own by propagating microbes from the air and the grain, or you can get a starter from someone who is already maintaining one. I have not started one myself—I got mine as a gift and it originally came from King Arthur Flour. There are many sets of instructions for starting your own, but I would start with the Breadtopia one, since they seem to know their stuff. If you don’t feel like trying on your own and don’t know any regular sourdough bakers, you can get some for the low cost of a self-addressed stamped envelope from an interesting society called Carl’s Friends. Or you can buy a starter from any number of places, including King Arthur Flour and Breadtopia (note that these links are for a living wet starter that will need to be taken care of immediately upon receipt—if you’re not going to get to it right away, go for a dry starter that will take longer to revive, but can sit unattended for months). Follow instructions from your source on how to activate your starter.
Some people use only bottled or purified water, but my tap water has been working just fine so that’s what I use.
Maintaining the starter culture
I keep the starter in a ~16-oz glass jar. This is the minimum size jar needed for this quantity of starter—you could use a slightly bigger jar or crock. Starting with about ~¼ cup of starter, add ¼ cup flour and ¼ cup water. Mix with a fork and then leave for ~8-12 hours (overnight) at room temperature with the lid on loosely. In the morning add ½ cup flour and ½ cup water and mix with a fork. Leave at room temperature for 1-2 hours. At this point it’s ready to use for making bread, but I usually put it in the fridge so it’s ready for the next time I make bread. It will keep in the fridge for a couple of weeks. The longest I’ve left it is about 3 weeks. If you leave it much longer than that, other microorganisms that you don’t want can contaminate it, and you might have to start over.
I have been using a refined flour for feeding the starter just because we have a bag of flour that needs to be used up. Once it’s done I will probably switch over to a whole-grain flour.
Making no-knead sourdough rye bread
Ingredients:
1 tsp salt
1 cup rye berries
1 cup wheat berries (hard red winter wheat)
1 cup sourdough starter
1 cup water
I generally start the bread as the last thing I do before I go to bed, and I let it do its first rise overnight.
I use the starter fresh from the fridge without worrying about reviving it.
I store the grains in the freezer so that they don’t get as hot during grinding. Put the grain and salt in the Vitamix dry container if you have it. (If not, you can use the wet container, but just be aware that the container will get scratched up significantly faster than usual.) Blend on high for 1 minute. Do not blend for much longer than 1 minute because heat will build up. I like to do something that’s not officially recommended: during blending, once the flour forms it will start to move up the sides with a hole in the middle where the blades are. I use a chopstick to knock the top of the flour back down into the blades to facilitate continued blending. You just have to make sure that you are extremely careful to not put the chopstick in too far. The one good thing is that unlike when you are blending liquids, there isn’t a vortex that will suck the chopstick down into the blades, so it’s not hard to keep it well clear of the blades as long as you pay attention.
After the minute of blending, dump the flour out into a medium size mixing bowl—I use this 2.5-qt glass one. (You could mix the dough in the machine, but I find hand mixing is easy, and it makes cleanup easier.) Add the 1 cup of water and ~1 cup of starter. I just eyeball the starter as I pour, aiming to leave about ¼ cup in the jar. (Eyeballing means that my bread is not identical every time, but I don’t mind the slight variety.) Mix with a mixing spoon until the flour is combined with the liquid. It takes me about 1 minute. It should look something like this: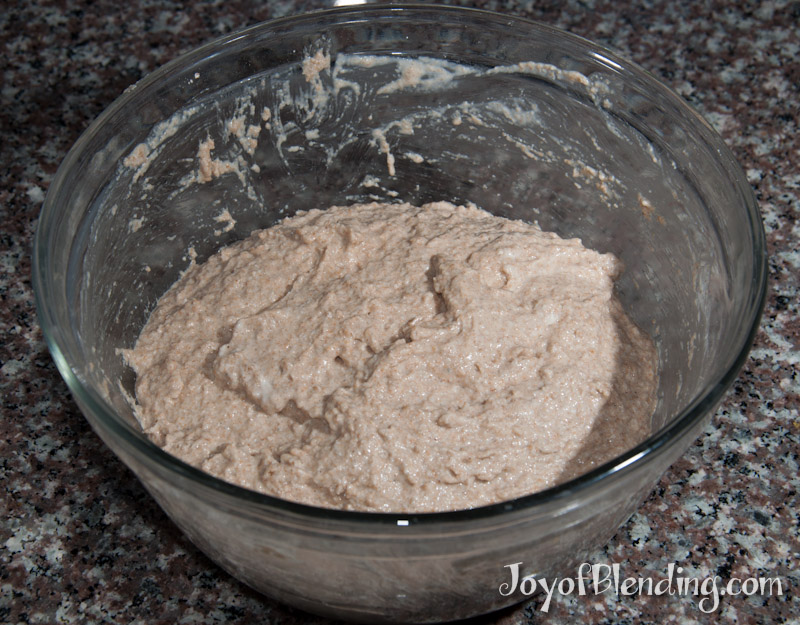
Now let it rise for 8-12 hours. It should ideally be kept at somewhere between 68 and 80 °F, and you don’t want to let it dry out. If your house is in this temperature range, just cover the bowl (a plate works fine). If your house is colder, as mine is in the winter, then you may need to use some sort of other trick. I’ve been using a microwave trick: boil 2 cups of water in the microwave, and then leave the hot water in the microwave and add the bowl of dough and leave the door closed. This makes a nice humid environment and also keeps it a bit warmer. You could also look for another warm part of your house (on top of a hot water heater if it’s convenient, or in the oven with just the light bulb on may work).
Now is also the time to re-feed your starter. Add ¼ cup of flour and ¼ cup of water and mix up. Leave it out on the counter overnight with the lid loosely covering it.
In the morning the dough should have risen considerably:
Grease a loaf pan. Oil works, but a saturated fat like vegetable shortening will work slightly better. I usually rub about a teaspoon of olive oil around with a paper towel to coat the inside of the pan.
Give the bread a stir with a mixing spoon or sturdy spatula. It will quickly collapse back to its original size, which is what you want. Scrape it into the greased pan. The pan in these pictures is this stainless steel one.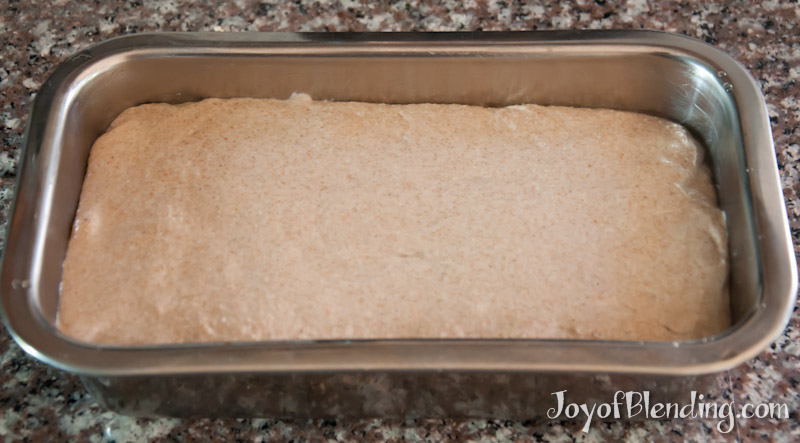
I usually use the above-mentioned microwave trick to speed rising. It will take 1-3 hours, depending on the state of your culture and the temperature. You want it to approximately double in volume, which will bring it about to the top of the loaf pan: 
Meanwhile, feed your jar of starter again. This time add a ½ cup of flour and ½ cup of water. Mix well, and leave out for 1-2 hours, and then return to the fridge for storage. Leave the top on loosely, and remember to use it within 2 weeks ideally, and 3 weeks maximum. If you aren’t baking for 3 weeks, you can discard a cup of it and add the above-mentioned series of flour and water.
Try not to let the dough rise past the top of the pan, because if it rises too far it will likely collapse. If something else comes up and you have to leave the house for some reason, you can interrupt the rising by putting it in the fridge. I have successfully left it in the fridge all day and then baked it in the evening.
When the dough is nearly to the top of the pan, preheat the oven to 450 °F. Add the loaf pan full of risen dough. Steam can help make a nice crust, so sometimes I toss some hot water onto the bottom of the oven right after adding the loaf and quickly close the oven door. Professional bakers use steam injectors that are much more effective than this method. I’m not sure how much difference tossing the water in actually makes. If you don’t want to toss in the water, you can sprinkle some water on the top of the loaf before adding so that the top stays moist at the beginning of baking. After 10 minutes, turn the oven down to 375 °F, and bake for another 30 minutes.
This initial hot-baking step is not necessary, but it makes the top crust a bit crunchier. After 40 minutes of baking check the loaf for doneness. The best way is to use an instant-read digital thermometer. You can use the Rolls-Royce of instant-read kitchen thermometers, the Thermapen, but a run-of-the-mill one also works. I stick the thermometer into one of the naturally formed cracks or holes in the top of the bread and insert it so that it reaches about the middle of the loaf. With this recipe, which has a relatively wet dough, I cook to an internal temperature of 205–208 °F. If you don’t have a thermometer, you can cook until the top is slightly browned, or supposedly you can tap the bottom to see if it sounds hollow. But really I recommend using a thermometer.
Once it’s done, let it cool for about 10 minutes. (If you try to remove it too soon the loaf can break.) Then remove it from the pan. If you have a non-stick pan it should pop right out. If your pan is not non-stick, then you should run a knife around the edge to loosen it, and then the bread should slide out.
The flavor of sourdough will develop over the course of a couple of days. Some people recommend not cutting into it until it has rested for a day. However, I’m usually too impatient. The flavor will develop even with a cut loaf, so we usually enjoy a few slices the first day, and then leave the rest.
One of the nice features of sourdough is that it stays good longer than typical yeast bread. I store it out on the counter, cut side down on a cutting board. I don’t know the upper limits of how long it will last because we usually finish it in a few days. Sometimes I cover it with a dish towel, but that’s not necessary.
It’s much better warm, so I always put freshly cut slices in our toaster oven to warm them up. It makes a great hummus sandwich, and also pairs well with most soups. You can also make it into some tasty croutons, especially as it gets older. I described the process in my southwest soup recipe post.
*It is not certain how important these factors are nutritionally, but there are a few well-documented changes that happen during sourdough fermentation that may be beneficial.
Phytase enzymes that are present in grain are activated in acidic conditions of fermentation, and they break down phytates. Phytates tightly bind minerals like Calcium and Magnesium, so getting rid of phytates increases the bioavailibility of minerals. (See: Moderate Decrease of pH by Sourdough Fermentation Is Sufficient To Reduce Phytate Content of Whole Wheat Flour through Endogenous Phytase Activity.) If you eat a balanced diet you probably don’t need to worry about phytate content, but some people are concerned. Interestingly, most of the research on the subject is on phosphorous bioavailability of feeds for livestock.
Also, the microbes in sourdough digest gluten proteins. A number of studies have shown that celiac patients were able to tolerate properly fermented wheat breads. Most people don’t have to worry about gluten, but with so many people talking about gluten sensitivity, this may be of interest.
Finally, sourdough fermentation may reduce the glycemic index of bread: Glycemic index and phenolics of partially-baked frozen bread with sourdough, Sourdough-leavened bread improves postprandial glucose and insulin plasma levels in subjects with impaired glucose tolerance. ↩
A hearty endorsement and a caution:
Fresh ground grains yield MUCH, MUCH tastier results (in breads and pancakes) than store-bought flours. My wife’s theory is that they start going rancid very soon after grinding.
Catching and cultivating wild yeast from the air is an exciting but fraught endeavor. Different species produce different tastes. You might end up with bread that tastes AWFUL. The different strains battle it out while you’re growing them, and one ends up victorious. It remains the dominant strain for generations (look up “quorum sensing” for the current scientific explanation) — until you do something like leave it too long between refreshing. That’s the brief how and why people trade historic bits of sourdough starter.
Can sprouted flour be used to make sourdough?
I would assume so, but I have not done it.
I am going to try the vitamix with my gluten-free, nut-free, corn-free sourdough recipe. You have to beat it with a mixer for 3 minutes, probably to help the gf flours soak up the moisture more evenly. Hope it works because I am tired of climbing to the top of my cabinet for the antique kitchen aid mixer.